 Live Radio
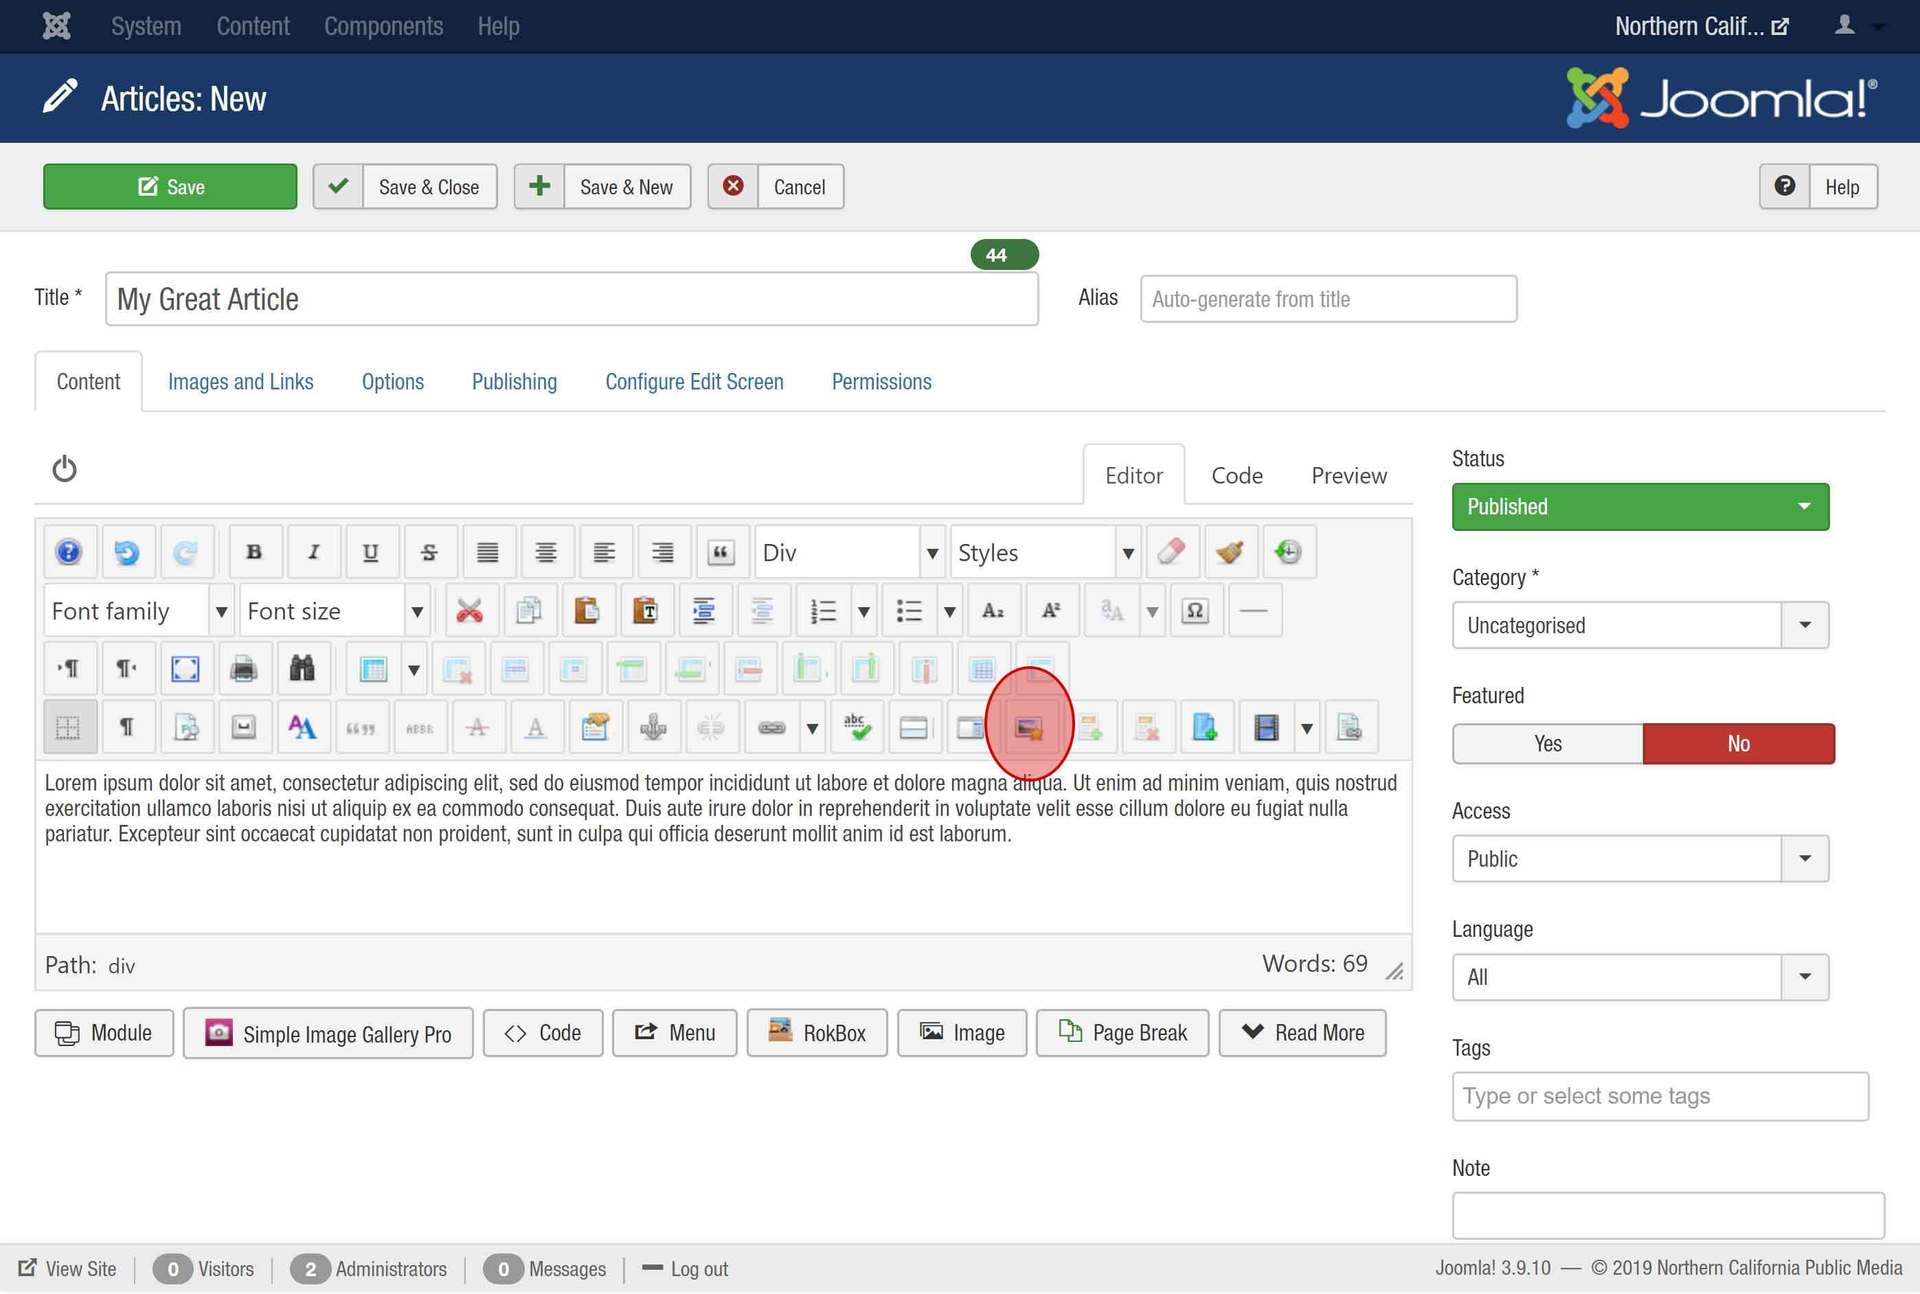
To begin add an image to an article, make sure the cursor is where you want the image to appear - before, after or anywhere within your text.
Click the 'Insert/Edit Image' button.
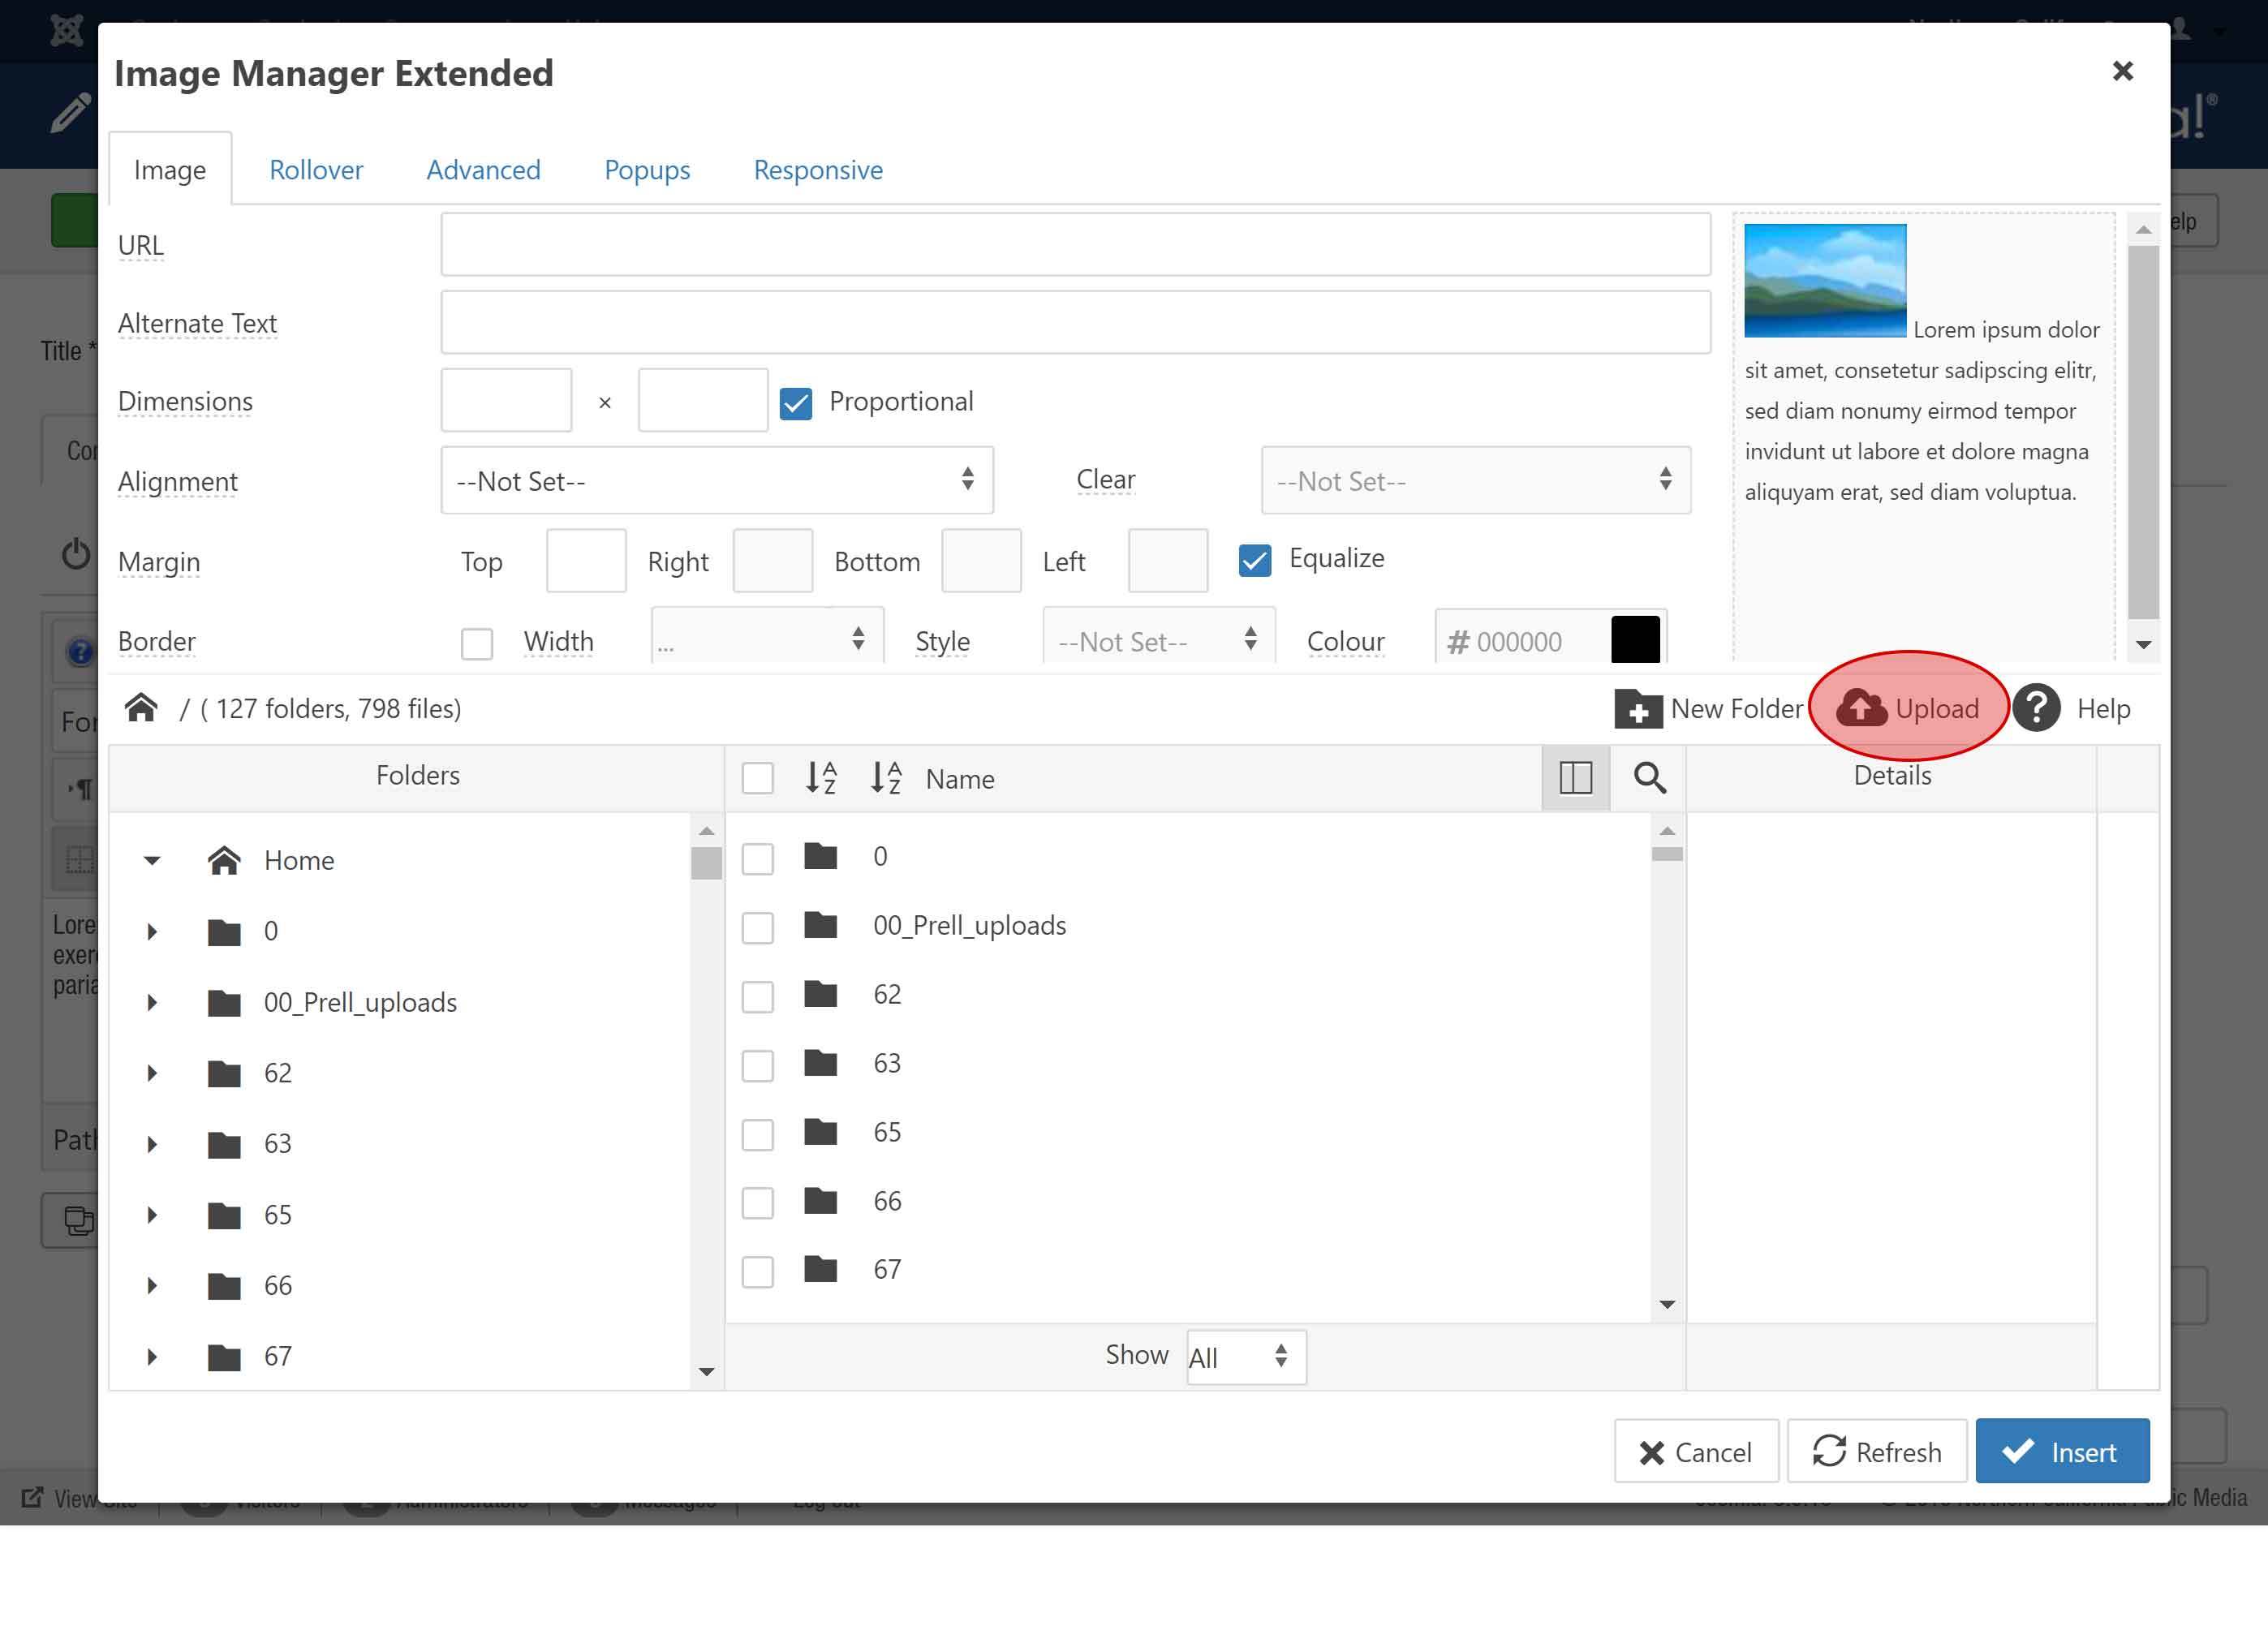
The image editor window is where you upload, edit and manage the properties of image files.
Folders are listed on the left, the content of folders are in the middle and a preview is on the right. Navigate (or create) to the folder you'd like to add an image to.
To upload a new image, click the 'Upload' button.
You can either drag and drop your image into this window or use the 'Browse' button to locate your image on your hard drive.
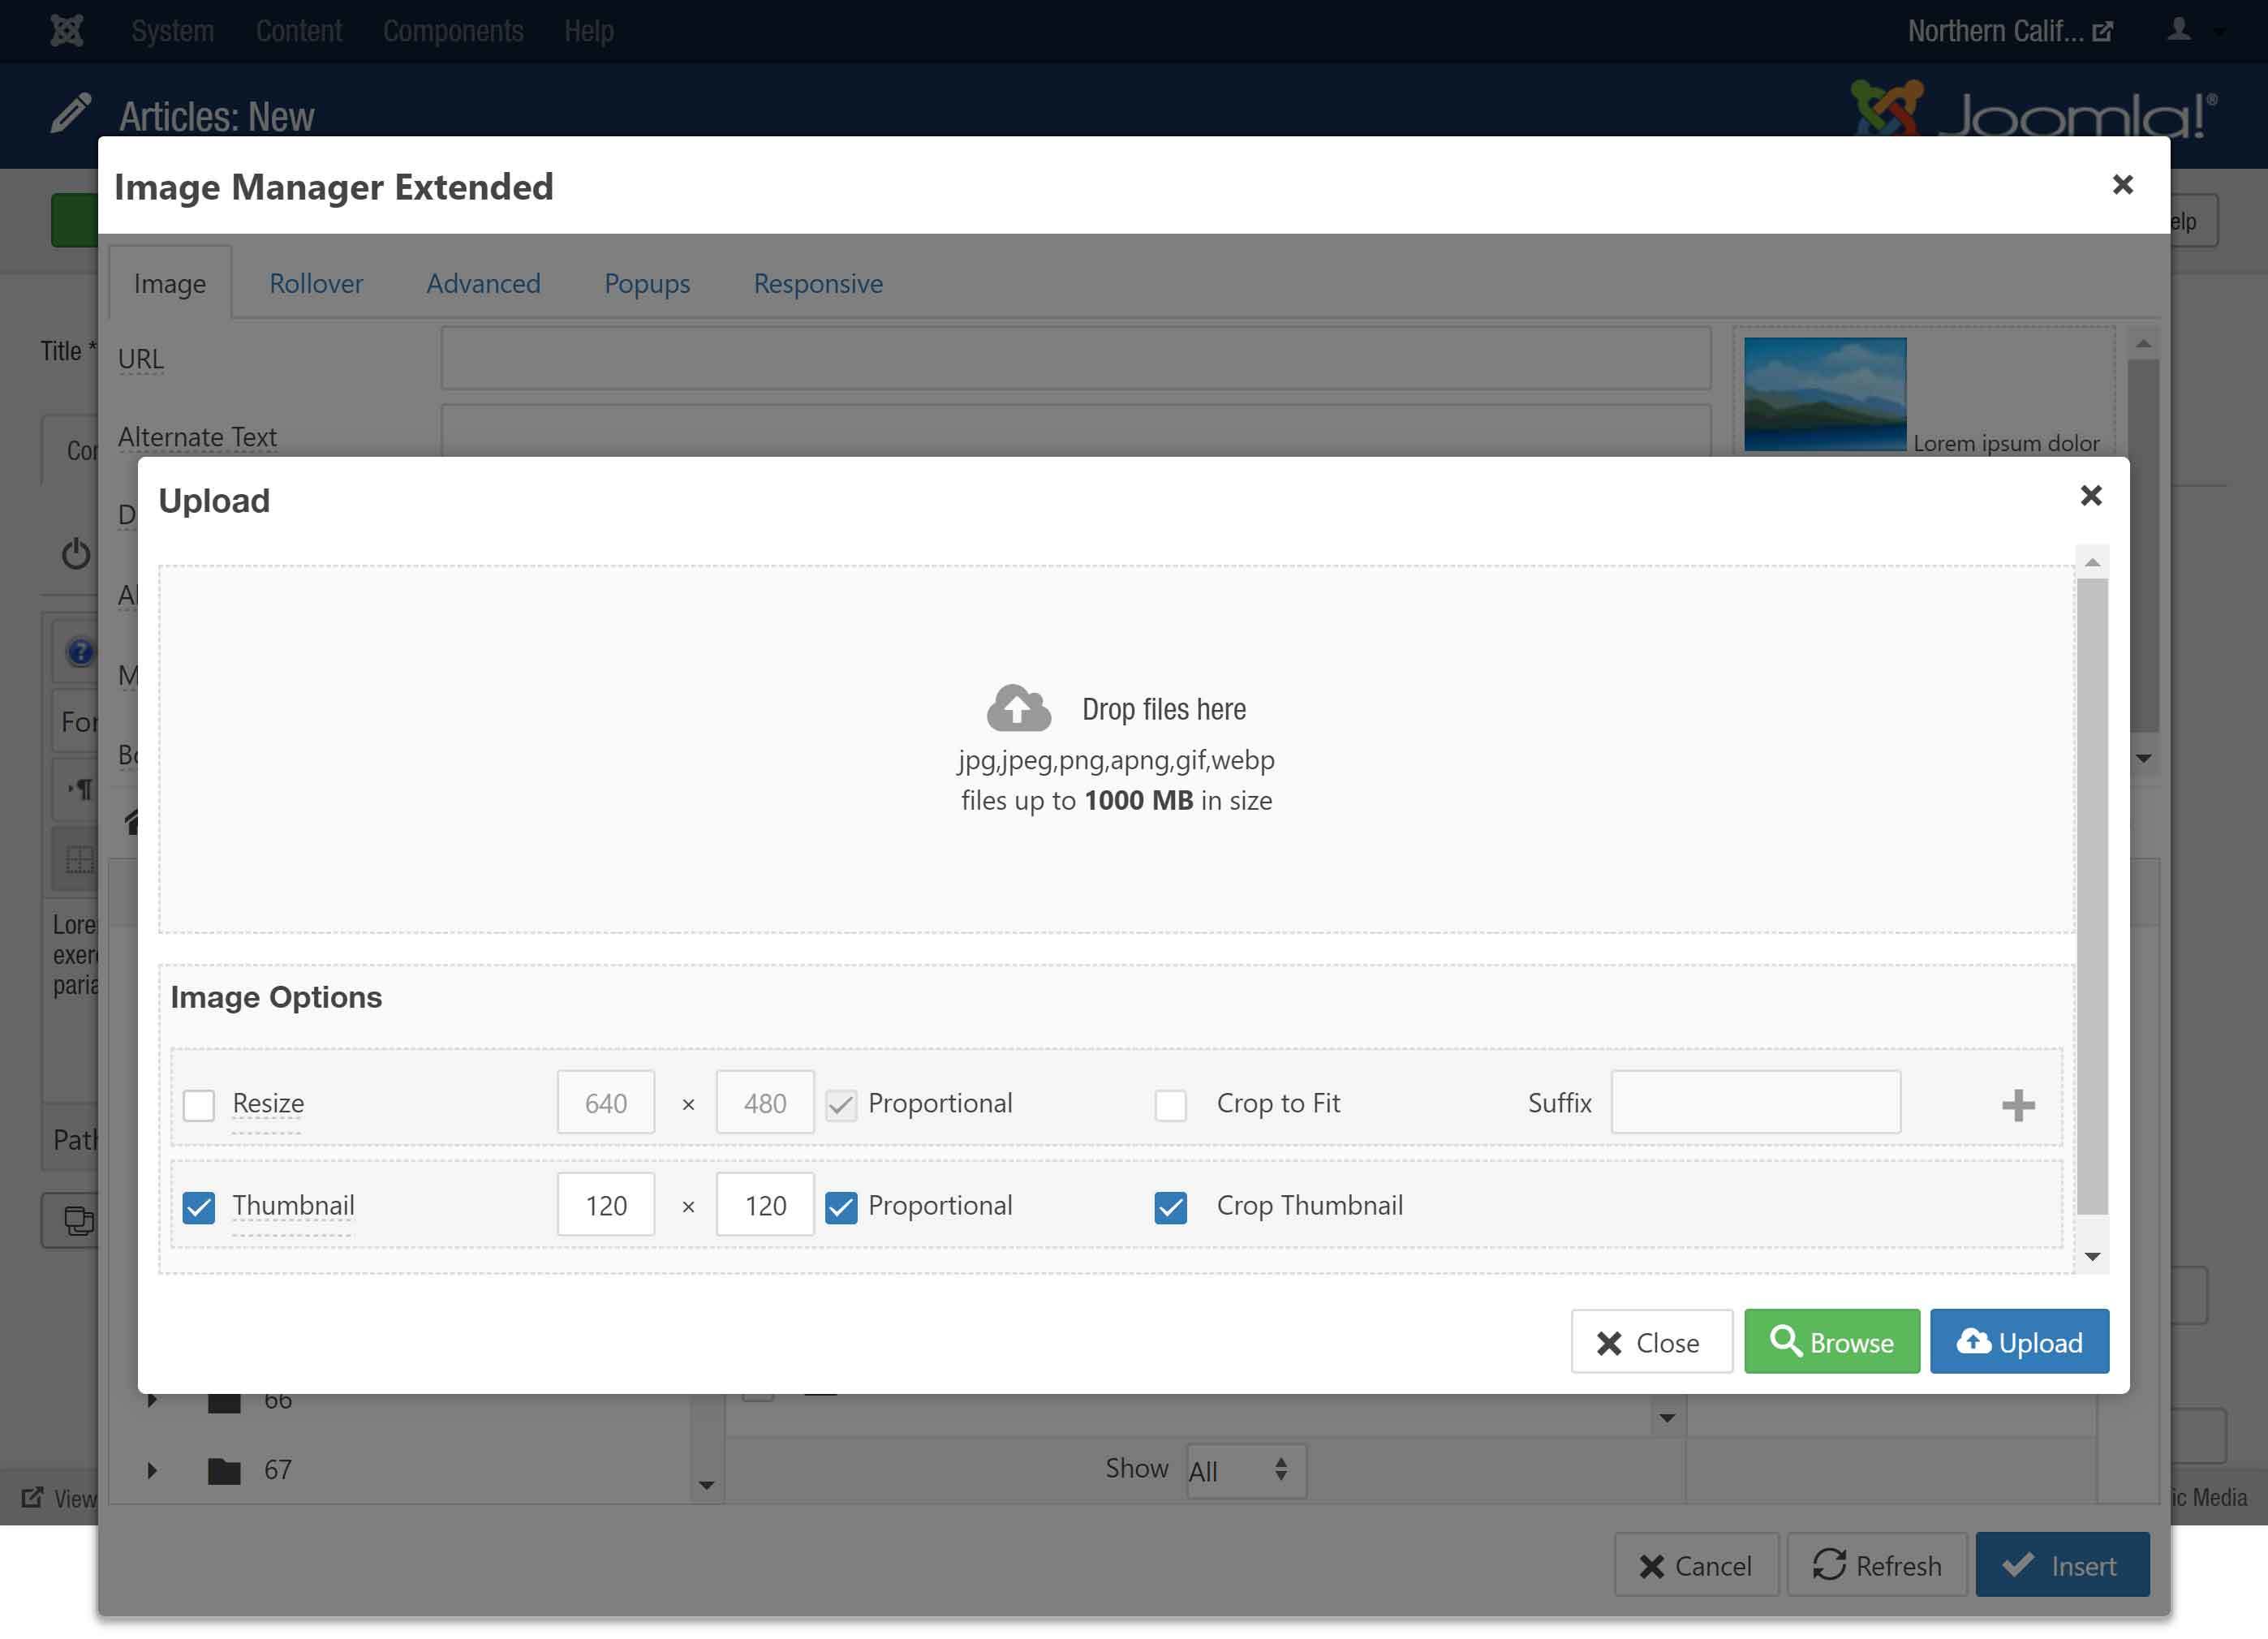
Select your image. You can can add multiple images in this window,
Images can be resized during upload as well if you check the box to resize them. If you wish to resize during upload, enter the desired size in pixels.
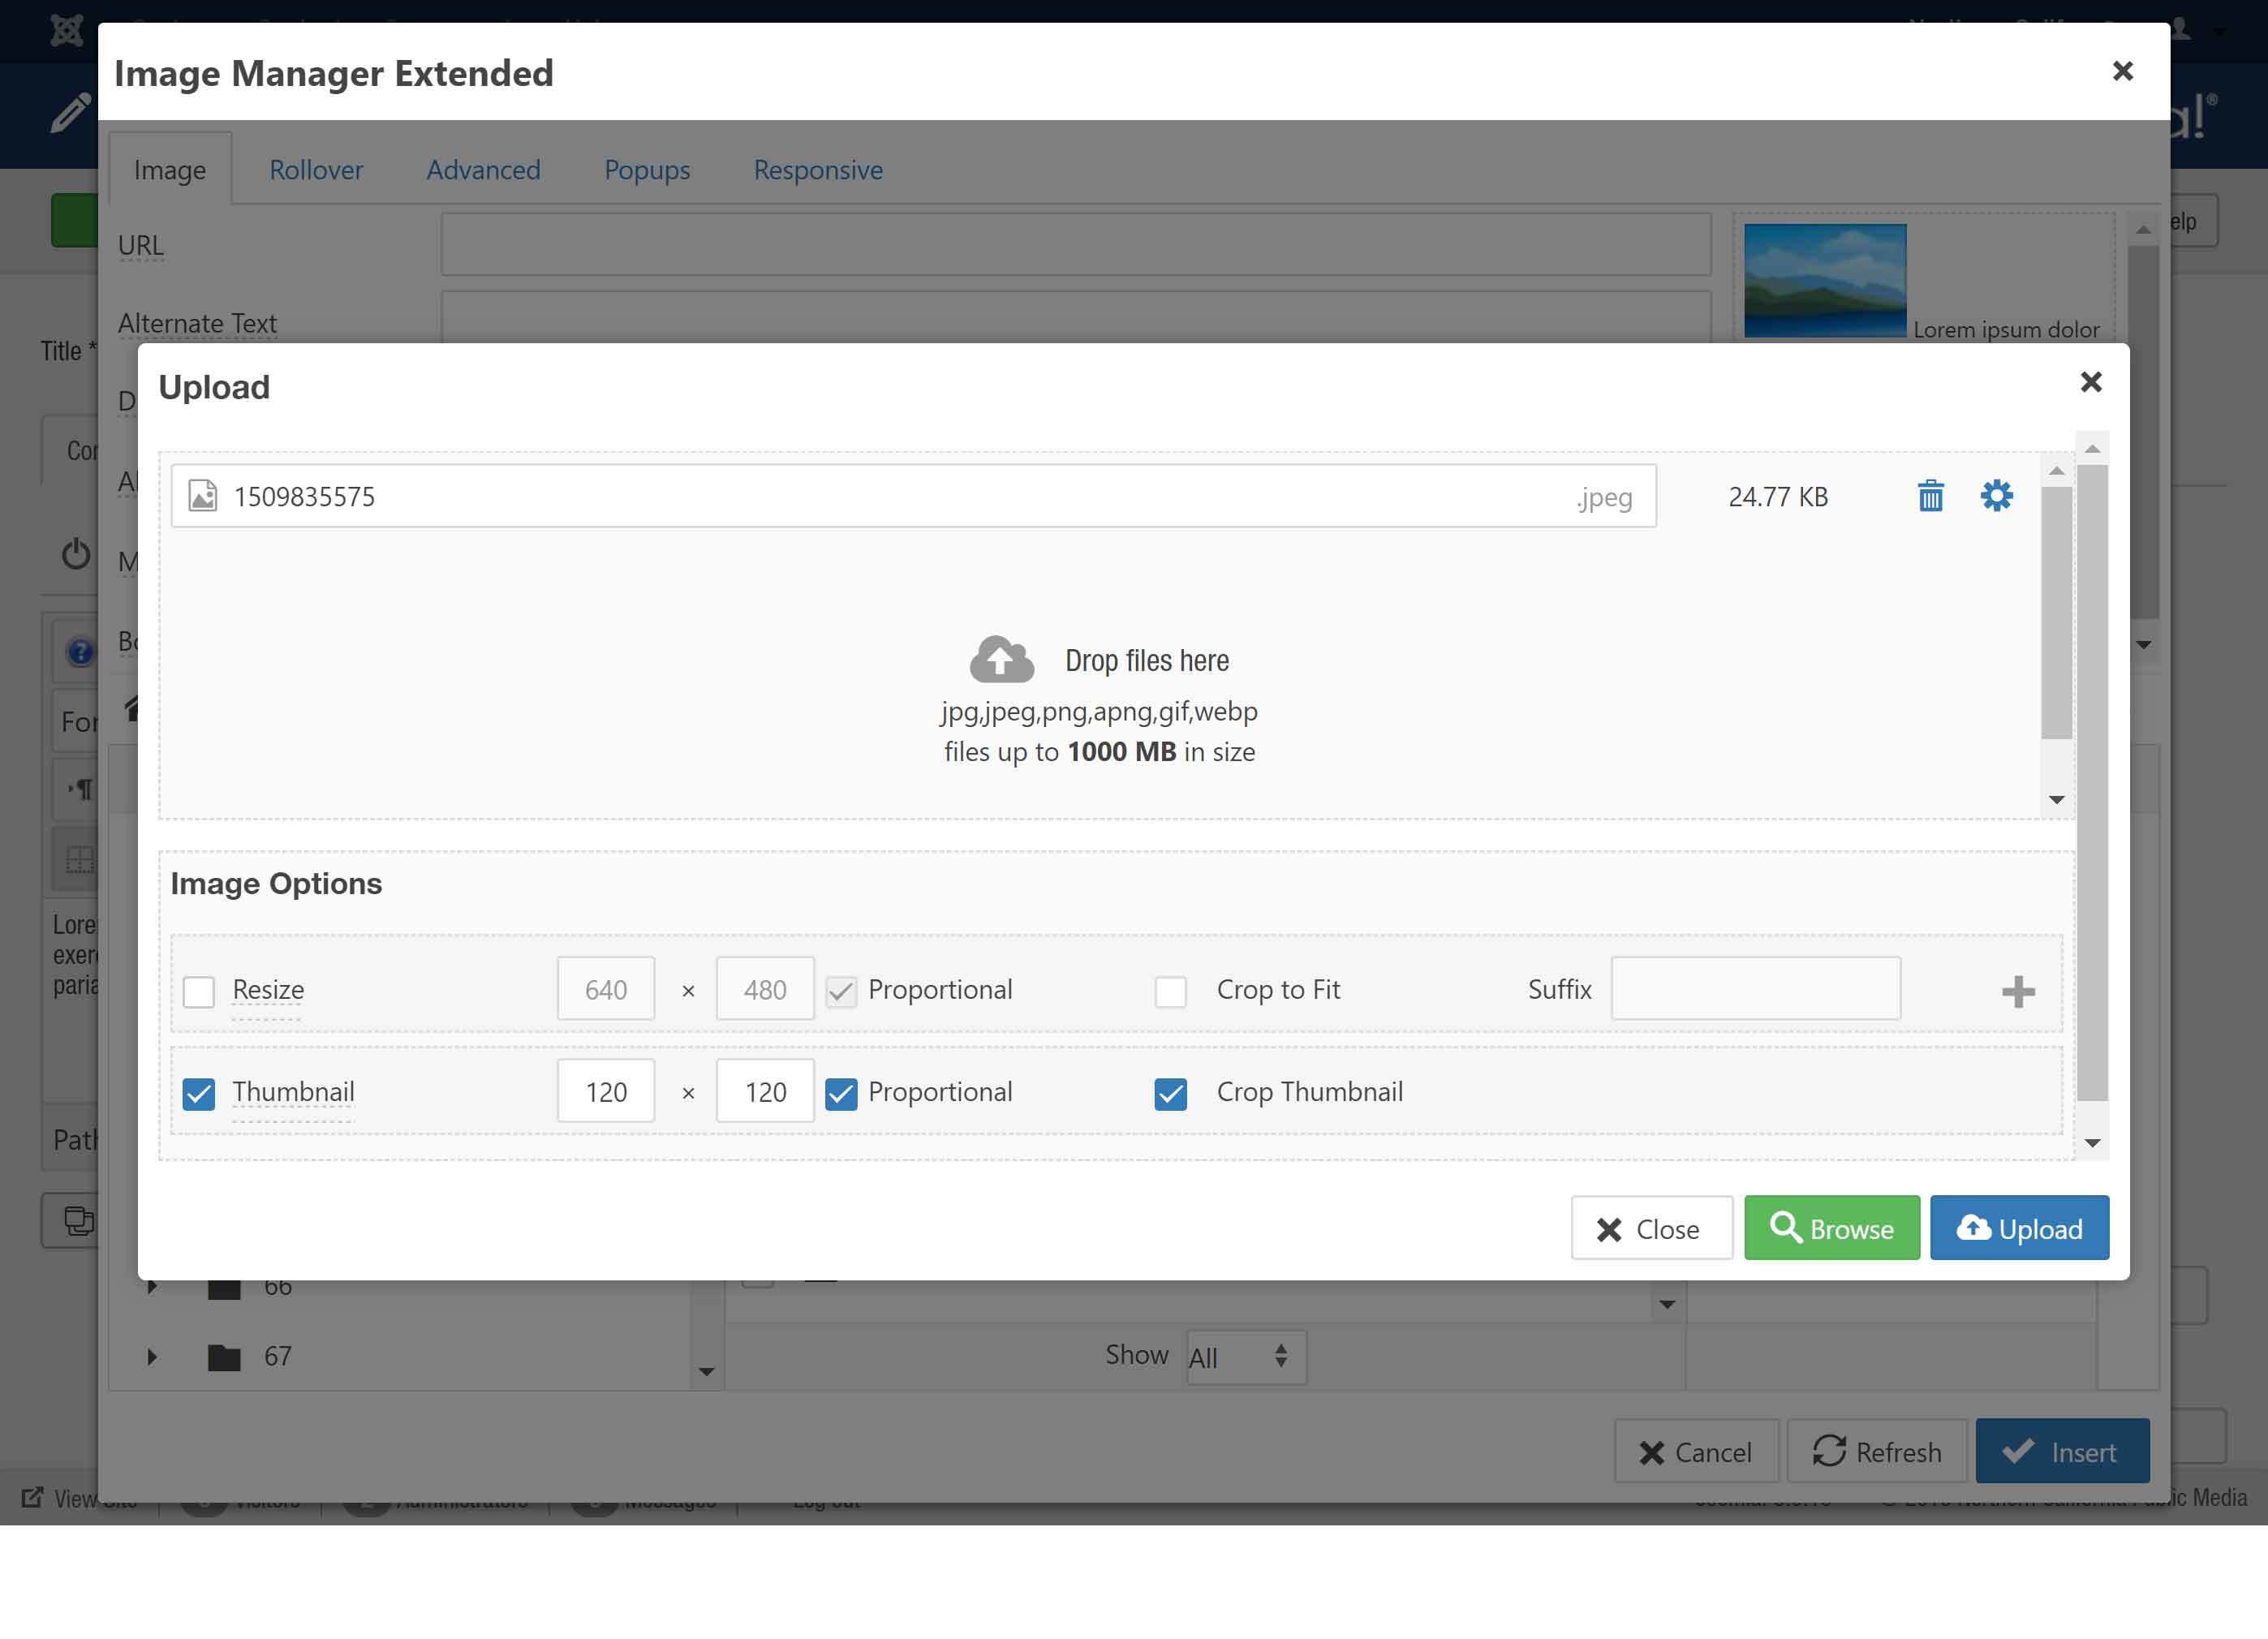
Select your image. You can can add multiple images in this window,
Images can be resized during upload as well if you check the box to resize them. If you wish to resize during upload, enter the desired size in pixels.
